

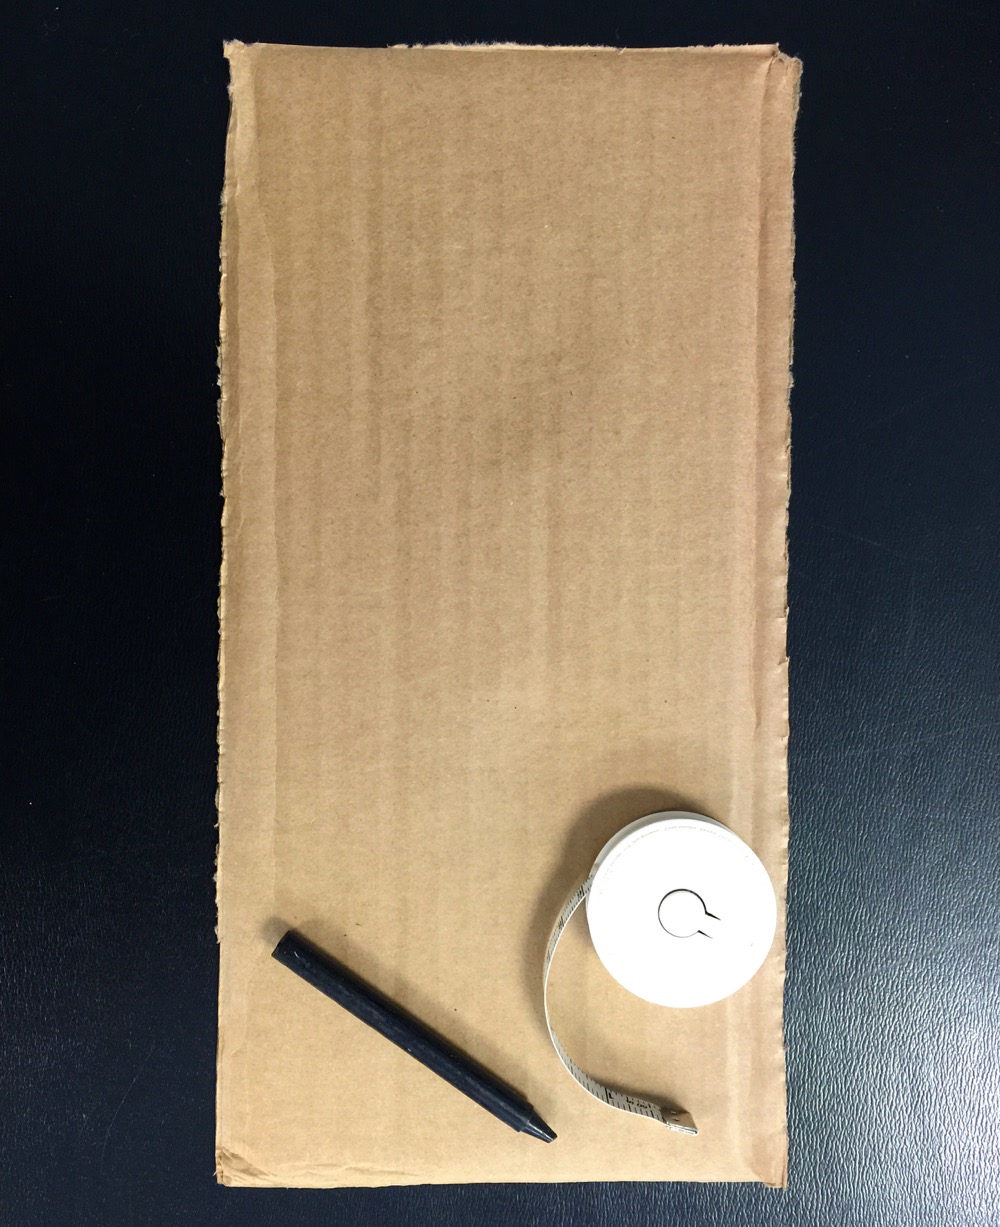
Step 1. Gather your materials: 1 piece of 6”x12” corrugated cardboard, tape measure, and chalk or crayon.
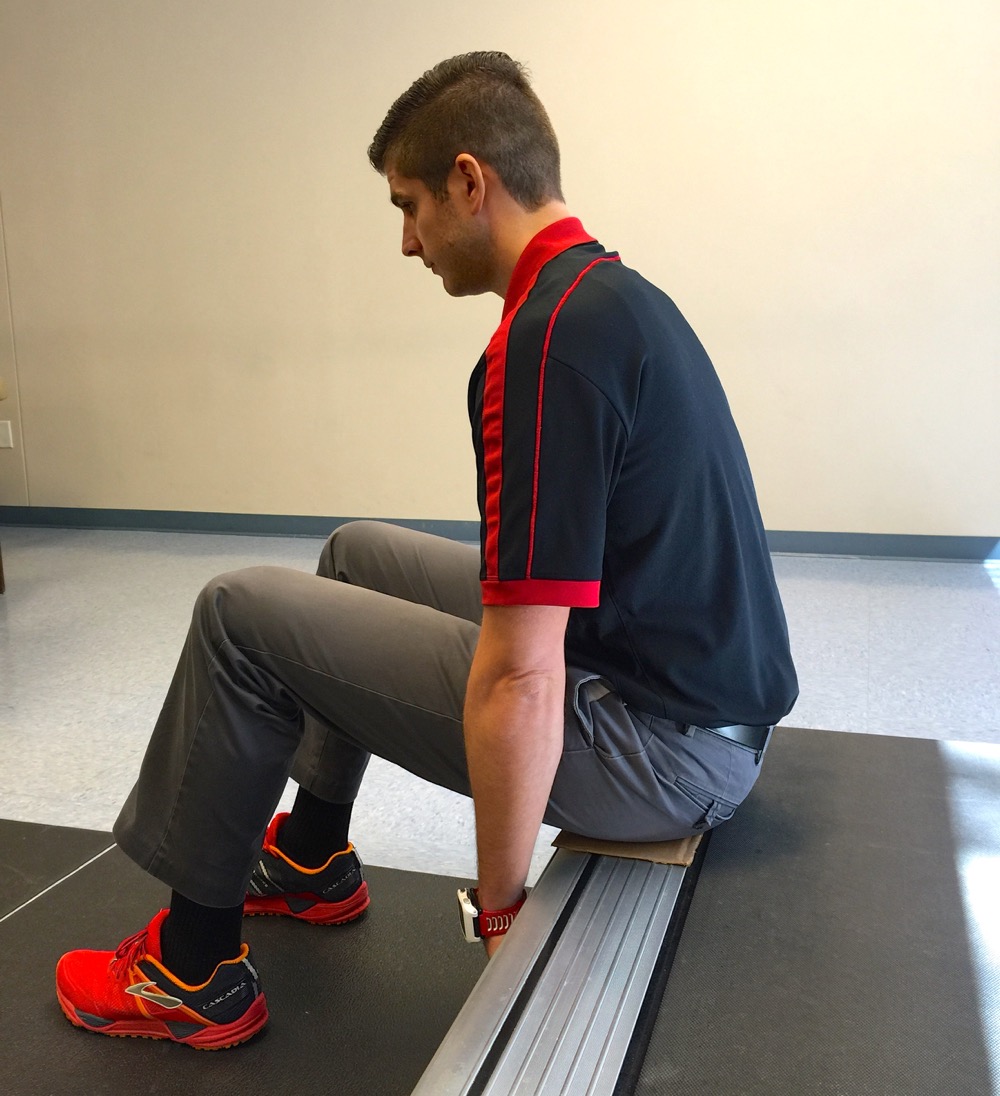
Step 2. Place cardboard on bench (chair, steps, etc.) then sit down on the cardboard with your feet elevated (so knees are above hips). Your end position should look similar to your riding position (trunk/hip angle). Make sure you feel cardboard compress.
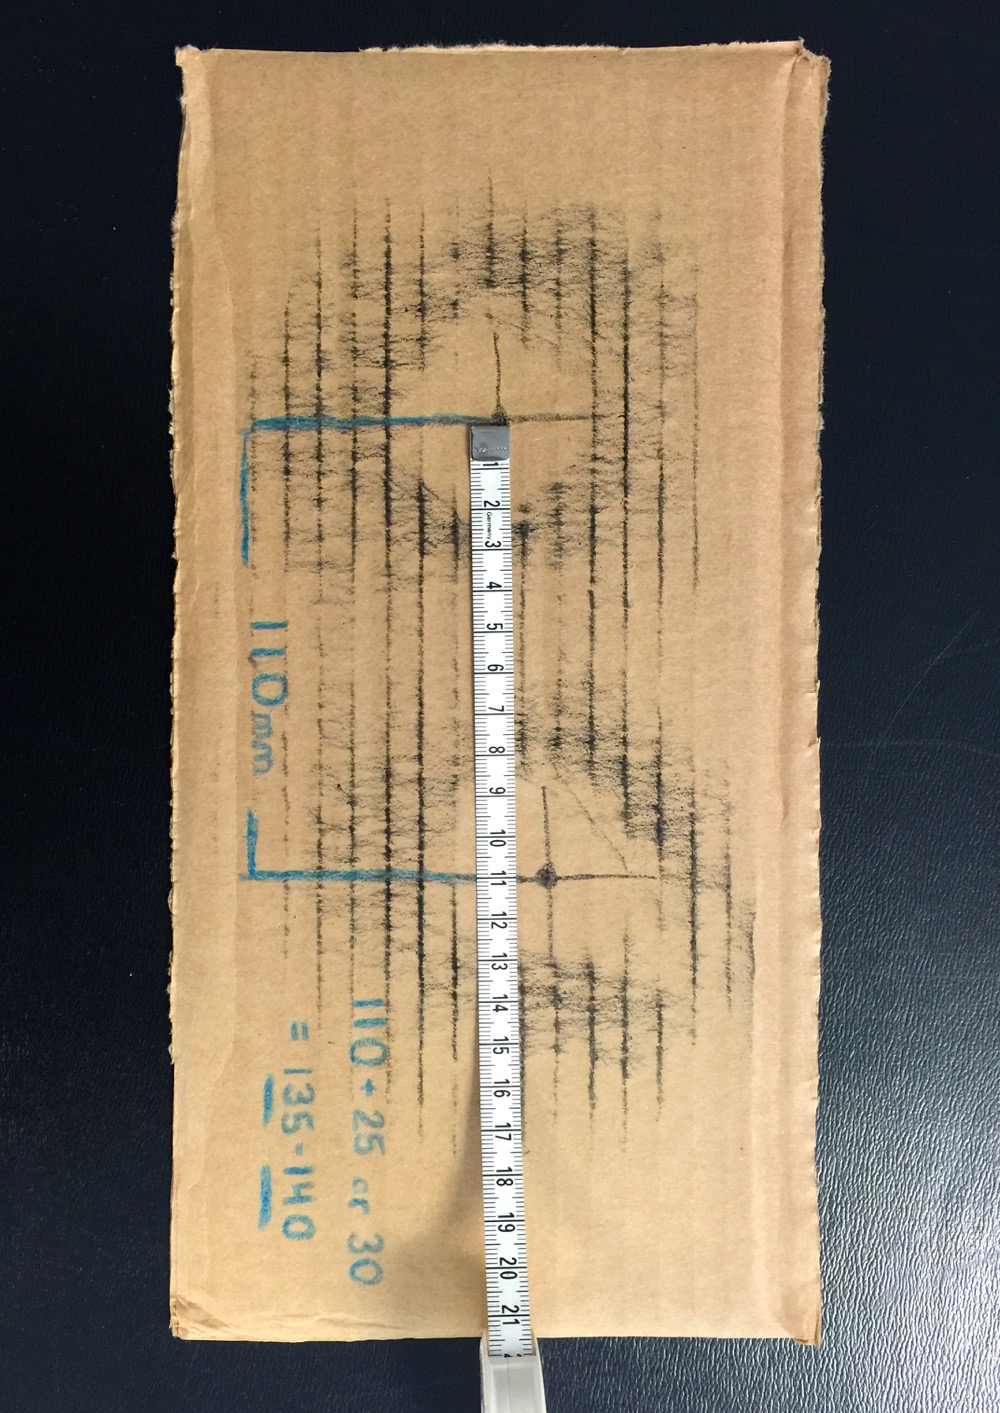
Step 3. Stand up. Using the flat side of the crayon or chalk rub over where your sit bones made contact. Draw a large X, with the center of the X, in the center of the now visible depression. Step 4. Measure, in millimeters, the distance between the centers of the two depressions. Step 5. Add 25-30mm to your total measure. This will give you an approximate saddle width when measuring the saddle at its widest part.
By Justin Loss
For many cyclists and triathletes spring ushers in a long awaited return to the road. Early in the season, as riding mileage increases, riders may find their once comfortable bike no longer feels like it fits. This often leads to time spent tinkering on your own or with a bike fitting professional to make everything feel right again. Dr. Andy Pruitt, who many consider the godfather of modern bike fitting, describes a good bike fit as a marriage between the bike and it’s rider. Where you make the bike fit your body, not the other way around.
If the bike fit is a marriage, then a bike saddle is the engagement ring; it all starts there. The saddle is the primary contact point between rider and bike, making it the foundation for power and comfort! Gone is the day of the one-size fits all philosophy. Today there are saddles to fit every rider shape and size, making it possible to find a comfortable solution for most everyone.
So how do you select the right saddle? First, do not…I repeat DO NOT select a saddle based solely on color, brand, what the pros are riding, what your neighbor is riding, or any other non-objective means. DO choose a saddle based on your body dimension, specifically the distance between your ischial tuberosities/sit bones (or better yet find a fitter that can perform a saddle pressure scan). If too narrow, the saddle acts like a wedge pushing between your sit bones driving them apart and impinging all the soft tissue in between. Figure 1 here outlines a down and dirty way to measure your sit bone width at home.
Another important consideration is saddle firmness. Although softer may seem better, your hard ischial tuberosities will push through the saddle and shorts padding causing it to well up between your sit bones causing similar problems to those mentioned above.
Proper saddle selection can eliminate a multitude of problems beyond pain and discomfort. Have you ever dealt with numbness “down there” and no matter how you adjusted yourself or the saddle it wouldn’t go away? A saddle too narrow or too soft can cause that sensation.
In the end you want to choose a saddle of moderate firmness and the appropriate width. Most local bike shops offer fitting services that can assist you in this important process. Often, they even allow trying out a saddle and returning it if doesn’t feel right after putting some miles on it. While it is enticing to price shop on the internet, the ability to exchange saddles until you find the best fit and help in the process makes the local bike shop the ideal place to make this important purchase. Happy riding!
# # #
Justin is a physical therapist with ATI Physical Therapy in Chapel Hill, NC. He treats triathletes across all three sports with a focus on lower extremity injuries. Justin has presented research nationally on patellofemoral pain in runners and is a graduate of East Carolina’s physical therapy program. He self-proclaims to be the “most active lazy person there is” because of a slight addiction to TV and endurance sports. Most weekends you can find him, and his fiancé Carli, training, racing, or on the couch binge watching Netflix.